Create Lab Order
Creating a lab order is the final step in fulfilling an order through Digital Studio LP. Once the lab order is created, it is either uploadedthrough the internet directly to your lab, or a compressed order file containing all the high-resolution images and any information regarding cropping, composite images, and print services, is outputted onto your hard drive to be burned to a CD or DVD and sent to your lab.
 |
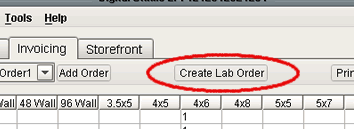
After checking the information on the Invoicing screen to make sure it is correct, press the Create Lab Order button, located in the upper center of the screen, directly above the invoicing grid. |
 |
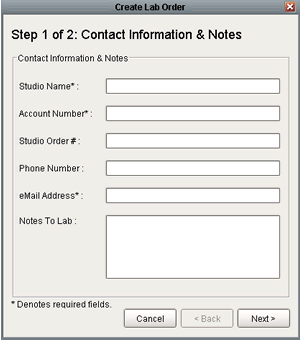
A window opens up, displaying the first of two steps required to create a lab order. This first page asks for all contact information, and any notes which may be helpful to the lab for the printing process. Each lab has a different specification for required information, which are noted with an asterisk* next to the field. |
 |
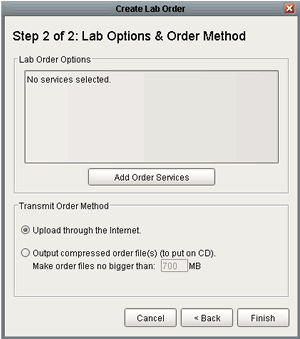
Pressing the Next button opens the secondstep of the process, where you will select any lab services or options, and specify which way you wish to transmit the order to your lab. Labs that offer drop shipping will have a button on this screen, opening a window, and allowing you to fill out all of the drop shipping information.
On this screen you also have the ability to designate the size of the outputted file for burning to CD or DVD. If the order file is larger than the designated output size, a second file will be created which can be burned to a second CD or DVD for uploading to your lab. Pressing the Finish button begins the uploading or file creation process.
|
***If the high-resolution images used in the project have been moved from the initial location they were imported into the project from, a Locate Image window will open and prompt you to locate their current location through Digital Studio LP. You have the option of either locating the individual image or locating the entire folder the images are in. If you use Locate Folder, after the correct folder is selected, a window will open and ask you if you would like to look in this folder for any other missing images. If all of the images for the project are in the folder, press Yes, and the upload or file creation process will resume.


